Showing posts with label CASE Monday. Show all posts

Monday, September 25, 2017

CASE Monday - Painted Harvest

Hello, my stamping friend!
And Happy Monday. Today I am CASing my own case from several months ago. This layout is my "go to" for quick cards. I tried to recreate it once again with my new favorite set - Painted Harvest.

Peekaboo Peach/Pumpkin Pie combo for flower with crumb cake for center and Old Olive for leaves:
Pool Party/Bermuda Bay for flowers and garden green for leaves
New in-color combo: Powder Pink/Berry Burst, Lemon Lime twist:
Another in-color combo: Powder Pink/Fresh Fig, Tranquil Tide
Sweet Sugarplum/Rich Raspberry:
This was most unusual combo - sweet sugarplum/soft suede for flower. It gives the card very natural look:
Leaves are punched from vellum and champagne/copper foil.
 How Tos:

  • Card front is 8.5 x 5.5 piece of card stock scored at 4 1/4
  • Whisper white - 4 x 5 1/4. Take a framelit that you will use for sentiment and lightly trace inside of it on the whisper white piece. This will give you idea where to stamp flowers and leaves
  • Stamp flowers and leaves as desired. Adhere to card front
  • Punch accent leaves from vellum and foil. You can stamp on velum first than punch
  • Stamp sentiment on a scrap of whisper white, cut with the ftamelit
  • Add greeting with dimenstionals
  • You can add extra layer of soft sued between card front and white piece. If desired, reduce the whisper white piece to 3 7/8 x 5 1/8 and cut soft sued 4 x 5 1/4.
That is all.Very quick to make and with so many colors - possibilities are endless! What color combo will you choose?
Place any order in my store and receive 2 of them in the mail.
Happy Stamping!

Glue Dots
[103683]
$5.25

Monday, August 28, 2017

CASE Monday - Painting with Coffee

Hello, my stamping friend.
For this Case Monday I selected Coffee Cafe bundle. I came across the card about 2 weeks ago and really liked how coffee cup was watercolored. As I am not very skilled in this technique, I watched a video and lady was  coloring with real coffee! How cool is that. I decided to give it a try and here is a result:
 Actually - I was preparing for about a week to make those cards as I needed to build my coffee pallet first. I was collecting last few drops from the cup of a strong coffee in a small container and let it dry out. Next day I would add few drops again. Soon I had a good amount of dry coffee paint and was ready to create:
First I stamped cup on 2 3/4 x 3 3/4 piece of watercolor paper in crumb cake and the top in early espresso. Then using aqua painter started to color. It was so much fun and smelled so good!
Another variation of the same card.
The card layout is very simple and great for creating multiples.
  • Crumb Cake CS 4 1/4 x 11 for card base and piece to stamp coffee beans
  • Watercolor paper: 2 3/4 x 3 3/4
  • Early Espresso: 3 x 4
  • Designer Paper:  1 1/2 x 4 1/4
  • Whisper White - scrap for sentiment
  • Pear Pizzazz - scarp for die cutting 
What do you think? Give painting with coffee a try!

Happy Stamping!

Big Shot
[143263]
$110.00

Monday, July 31, 2017

Case Monday - Daisy Delight

Hello, my stamping friend.
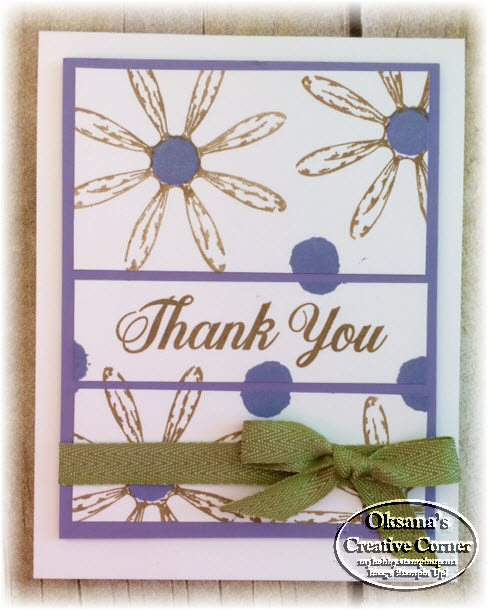
From time to time I like to CASE a card and create many variations of it. I also like to find a card template to follow. This one can be used in so many different ways, many occasions, with just stamping or designer paper. The idea is to use blocks of paper as a focal point on you card with the greeting as a middle block. Check those 2 cards - they are using absolutely same template.
Designer Paper:
 Stamped blocks:

Here is measurements:
  • Card base - 4 1/4 x 11 ( I used whisper white) 
  • Colored mat - 3 3/4 x 4 3/4 (crushed curry in samples) 
  • Color Blocks - they are all 3 1/2 wide. Top piece 2 x 3 1/2, middle - 1 x 3 1/2 (for greetings), bottom - 1 1/4 x 3 1/2. 
Stamp greetings in the middle. If you use designer paper for 2 other blocks - just adhere your blocks to the colored mat, wrap a ribbon and add to card front with dimensinals. If you are stamping - put all pieces on top of each other (top, sentiment, bottom) and stamp over desired images. Adhere to the colored mat in the same order you had it. Add ribbon and adhere to card front.
Use your Designer paper for quick set of cards.
I could not stop and created in many colors. Here is Lemon Lime Twist:
Berry Burst:
 Wisteria Wonder:
Super quick set of cards. Give it a try:
Happy CASing! Product List