Monday, August 31, 2015

Timeless Elegance Quick Thank You Cards


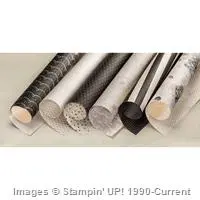
I was in need for many quick, easy and elegant Thank You cards this weekend for my club and online orders. I also needed few more to send to my friends who joined our family in celebrating very special event this Sunday. And Timeless Elegance Designer paper came to the rescue. I saw elegant cards created by very talented Lyssa Zwolanek for Convention display and I use her design as my inspiration.
How Tos: 
  • Cut designer paper 4 3/4 by 3 1/2. You can make 7 cards form one sheet of designer paper (DSP)
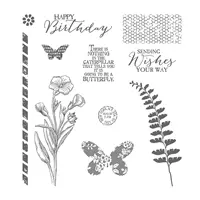
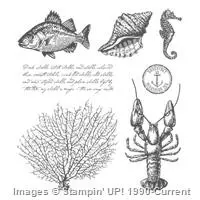
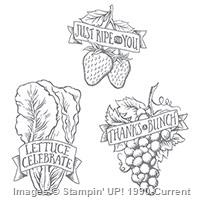
  • Stamp sentiment on DSP in black ink. Stamp fern image in Mint Macaroon randomly where you see empty spots on the paper
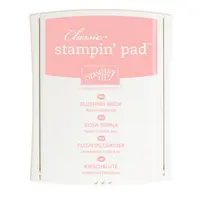
  • Sponge leaves design on the DSP with Mint Macaroon ink and sponge daubers and flowers with Blushing Bride
  • Adhere your stamped paper to 3 5/8 vy 4 7/8 black card stock with snail
  • Adhere with dimensionals to 5 1/2 by 8 1/2 scored in half Mint Macaron card stock
  • Add pearls.
Try using other colors and created Birthday Cards:
 Happy Stamping!

Tuesday, August 25, 2015

Flip Corner Card Instruction

Today I want to share how to make Flip Corner Fold cards. I made few more of them. Love those cards as they are perfect for guys, and we all know it is not that easy to make masculine cards.
How Tos:
Supplies needed:
  • Card base 8.5 x 5.5 scored at 4.25 ( Soft Suede in this example)
  • Stampin Up! trimmer
  • Another color of card stock 2.75 x 2.75 and 4 x 5.25 ( Crumb cake)
  • Card stock to stamp on and for inside of the card 2.5 x 2.5 and 3.75 x 5 (Lost lagoon)
Step 1 


Align left top corner of card base at 3" mark, cut from 2.5" to 4 7/8"

Step 2 
Turn card base, align left top corner at 3" and cut from 5/8" to 3". Two cuts will meet

Step 3 
The cut portion of the base is your card front. Lay it on the table positioned cut piece to your right (and not cut portion to the left). Hold top right cornet and 'flip' it toward card center.

Step 4
Align flipped corner in parallel to scored line and card bottom, crease folds with bone folder. Add glue dot or dimensional under the flip corner to secure in in place. if you plan to stamp background on card front or run it through embossing - do it before adding the glue dot/dimensional.

Step 5
Stamp on 2.5 x 2.5 piece, adhere it to 2.75 square piece and then to the card front. Do the same with 3.75x5 piece, adhere it to 4 x 5.25 and than to the inside.

Possibilities are endless. After you do one or two - it is super easy and quick to put together. Now the hardest part will be - what color and design to choose for your next Flip Corner Card.

Happy Stamping! 

I would love to hear from you what do you think about this type of card fold.

Sunday, August 23, 2015

Flip Corner Fold - Two Cards, One Design

I had a great time stamping with my club ladies yesterday. Funky folds and 3-D items are my favorite to make and I decided to teach flip corner fold this time. The other favorite thing of mine to do is to use the same layout and same supplies, but come up with 2 different cards.

This card was a bonus card and my stamping friends had a choice to make.


And guess what was the choice? Everybody made the berry card (the reason was because it used the new stamp). But the fish one is my favorite.
Stay tuned for more samples and instructions on Tuesday.
Happy Sunday and Happy Stamping. 

Wednesday, August 19, 2015

Take On August Paper Pumpkin

The card bases in August Paper Pumpkin are so beautiful. And I even feel guilty to use entire base for one card. Plus I also would like to make more cards with this month kit. The solution is simple - split one card base and use them for 2 cards. Kit already has extra black tags to stamp on plus leftover paper from punched flowers for a bow - and I can double amount of cards that cane be made with this kit (12 total).
 
How Tos:
 
  • Cut card base in half, then cut 1/4 from the top (3 3/4 x 5)
  • Whisper white cardstock 4 1/4 x 11 folded in half
  • Basic Black 4 x 5 1/4
  • Scraps of pink paper left from flowers to do bow and banners

Happy Stamping!


Tuesday, August 18, 2015

August Paper Pumpkin Is HERE!

My Paper Pumpkin finally arrived. Actually - two of them. My daughter Sophia is a brand new subscriber too. The card and a box - are her creations. 6 beautiful cards, 3 elegant boxes delivered to your door - it can not get any better than that!
Check this month video:

 
You can subscribe HERE

Sunday, August 16, 2015

July Paper Pumpkin Samples

Join Paper Pumpkin


I am patiently waiting for my August Paper Pumpkin to arrive. It did not come Saturday, hope Monday will be the day. So I decided to play more with July kit and use my favorite in-colors with it.


If you are not a Pumpkin Princess - you should be. Seriously. You need this in your life! I just love my kit each month, complete with an exclusive stamp set AND the ink! Half off means it's only TEN DOLLARS - and that's WITH shipping! I've recently added Pumpkin Perks for my members too! What do you have to lose? You will receive a gift when you sign up or refer a friend. You will also receive additional ideas each month with extra projects. Sign up today.

Friday, August 14, 2015

Gift Grom The Garden Class - Fun time

This past weekend, we had a blast with a garden-themed class. It was a colorful and lively day, full of conversation and stories-- and of course, stamping! To start off the themed class, all the crafters got fun 'Thank You' seed packets: the colors and subject tied right into our project.
We then dived right into our four cards and gift card holder. It was great seeing both regulars and old friends; the conversation never stopped and we flew through our projects!


 Though the mint macaroon and delighful dijon colors really complemented the stamp and style, I also demonstrated the brighter side of this theme. 
After a snack of homemade cupcakes and coffee, we discussed the usual: our favorite card! Though it was hard to choose, we all did in the end. After the class, another demonstrator and I shared cards from the swaps and anecdotes from the convention. Though all the cards are beautiful, we had some clear favorites. My demonstration board shows off some of my favorite cards, both swaps and my own!
What a great class with friends and stamps. I can't wait for the next month for another round of good company and creativity!