Wednesday, December 30, 2015

Botanical Blooms Calendar Instructions

Happy Wednesday!
Hope you have nice and relaxing time after the holidays. It is my favorite time of the year - just after Christmas and till first few days of January. It always feels so calm and relaxing, no more last minute things to complete and prepare, the calendar is not crazy busy yet and anymore, holiday spirit is still in the air. It is also time to look back for the past year and makes plans for new one.
Today I would like to share with you fun project - small desk calendar. I made one for our last blog hop and promised to share instructions. Well, I made several more - this time using another new products from Ocassions Catalog.
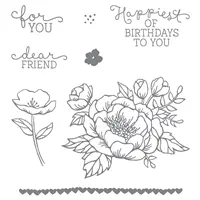
Those framlits are amazing and 3D! So many different floral pieces plus coordinating stamp set.

Close up look of flower and leafs:

How Tos:

  •  Card stock 4 1/4 x 11, scored at 5 1/2 for base; 4 1/4 x 5 scored at 1, 2 1/2, 4
  •  Fold 4 1/4 x 5 piece to form W shape. Apply adhesive to the 2 sides (outside of W)  and adhere inside of folded card base piece. It should look like this
  • I used calendars 2 1/4 x 2 7/8. I mounted them on a 2 1/2 x 3 1/8 piece of card stock.
  • Decorate as desired. I cut one big flower, sponged it in a center with sponge dauber. Cut 2 medium flowers in 2 different colors and 3 different kinds of leaves.

Would you like to receive one of the calendars?

Here is how:
  • If you placed any order with me in December -I will automatically mail it to you - lucky you!
  • Attend any of my local classes and you will be able to pick it up during the class (you may even choose the one you like the most)
  • Place the order with me and I will mail you calendar as a Thank You gift (please make sure you allow me to see your information by appropriately selecting a box, otherwise I will not know who you are and where to send the gift). To access my online store - click HERE and enter hostess code 4Y4PF6BP
  • Become new Paper Pumpkin subscriber and select me as demonstrator. More Info HERE
* Offer valid till February 29th.

End of the Year Sale - more items added. Check it out:

Happy Stamping!

Tuesday, December 22, 2015

Last minute Gift Card Idea and Bag in a Box Tutorial

Happy Tuesday!
Do you still need last minute gift? I have a solution for you - quick gift card/money holder.

 How Tos:

  • Start with a 6 X 6 piece of designer paper. Fold up about 2 1/2 inches, and fold the 1 inch flap down.
  • Add a 1 x 6 piece of designer paper under the flap.
  • Punch out a notch with the Circle Punch on the inside flap. 
  • Glue down the sides of the inside flap to create your pocket 
  • Wrap around a Belly Band, 1 1/4 X 8. Add a 2 1/2 inch Circle Punch and decorate
  • You can slide your belly band on and off! 

Occasion Hop details

I hope you had a chance to Hop with Team Stamp It and see all the amazing sneak peaks of upcoming catalog. If not - Start HERE.
I shared few projects and promised to add instructions today. Here you go.

My bag in a box - is a super simple project. I actually got the idea from Crafty Hallett back in April and making those bags since than. I made few adjustments to mine - it is actually slightly bigger as I use 4 x 12 piece of designer paper vs 3.5 x 12. My thought was -I will have 3 bags from one sheet of paper and no leftovers strips of paper. If you like me - I save every little bit of DSP and than end up with so many little scarps - I get overwhelmed. So 4 x 12 - perfect, no leftovers.

How Tos:

  • Watch Crafty Hallett video - she explains everything great!
  • DSP 4 x 12, matching card stock - 1/2 x 12 (2 strips) for top and bottom of the bag. Handles: 3/8 x 6 (2 ea), 2 1/2 x 5 1/4 scored at 1/2 on all sides for base
Give it a try. Use that Designer paper!
I will be posting instructions for calendar later this week.

End of the Year Sale - more items added. Check it out:

Happy Stamping!

Saturday, December 19, 2015

Team Stamp It Occasions Blog Hop

Welcome to Occasions and Sale-A-Bration Team Stamp It's Blog Hop!
You may have just arrived here from Stephanie's blog. If you are just started, you can navigate through the hop by clicking the Previous and Next buttons on the bottom of this post.

I am so excited to feature new items from Occasional Catalog! When I went to On Stage event Stampin Up hosted in November and saw new catalog - I just could not sit still! That catalog just absolutely blew me away - I love every single new item, stamp, paper, accessories. But I still have my #1 favorite - Birthday Bouquet Suit. The soft colors, beautiful images and font of the stamp, amazing accessories - this makes this suit my favorite. And designer paper - I feet so happy just looking at it.
Here is the ensemble I created with this suit.

Bag in a box - super fast 3D item to create and good for any occasions, with any designer paper and in any color. This purse is not small. It fits 4 1/4 x 4 1/4 card and bag with cookies.


Birthday Blooms stamp is great for water coloring. I used Watermelon Wonder and Mossy Meadow ink to color with aqua painter.


Calendars are always a good gift at the beginning of the year. Do you see a little shimmer on flowers? This is another favorite of mine - Wink of Stella. It became my favorite after using it first time - now all my projects include little sparkle.

Hope you liked my projects. Let me know what do you think. Would you like to receive this set on your special day or just because?
Stop by Tuesday for more details and instructions.

Team Stamp It give away:

 Next is Karen's blog:

Supplies Used:

Friday, December 11, 2015

Poinsettia Themed Class

Happy Friday!
Can not believe how fast time flies. It is getting so close to Christmas!
I would like to share some goodies we created at my last Happy Hour Class. Everybody had a blast, absolutely loved the pillow box with poinsettia and cards from November Paper pumpkin kit.
The 3-D poinsetta is super easy to create. We punched all needed pieces first, that stamp on them - it is much faster that stamp and then punch. We also used glue dots to assemble layers (attache 4 petals to 1 1/4 " circle), and than each layer with dimensinals.
We made few tags as well. Here is one of them - just punched designer paper!
And now announcing the winner of Blog Hop give away:
And the winner is……………..    April L
Congratulations April!   You will be contacted by email to receive your awesome present!

Stay tuned for next Blog Hop and another give away!

Check great deals for Year End Sale - many items from Holiday catalog are there!

Happy Stamping!