Happy Saturday!
Last week I participated in Team Stamp It blog hop and shared my projects - a card and a little basket. If you missed it - see full post
HERE. I got so many nice comments and feedback. Thank You everybody for kind words!
Today I will share with you how to create this darling basket. This basket is so easy to make, very economical - you will need just half sheet of card stock (same amount as you use for a card) and a scrap for a handle.
How Tos:
- Start with 4 1/4 x 11 piece of card stock. Score according to template - on 4 1/4 side score at 2 3/4 and on 11" side score at 1 3/4, 3 1/2, 5 1/4, 7, 8 3/4 and 10 1/2
- Cut small rectangle out (the grey one on the template) and cut on the solid lines.
- On the front of the basket layer add Sticky Strip to 1/2" tab on right edge and edge of 1st and 4th flaps from the left edge.
Flip the basket layer over and add Sticky Strip to edge of 1st and 4th flaps.
- Add Sticky Strip to each end of the 2” x 10-1/2” Designer paper (or you can use stamped Whisper White card stock instead). Add a line of SNAIL along the length of the strip.
Center strip on the basket layer starting at the end opposite the Sticky Strip on the 1/2” tab.
- Fold the basket layer along the score lines. Adhere the 1/2" tab with Sticky Strip to the inside of the opposite end to create the hexagon (6 sided) shape.
- Remove Sticky Strip backing from the two flaps where Sticky Strip is on the front side.
Fold those two flaps in so they just meet in the center ( to make it easier - a secure it with piece of sticky strip). Fold down the two flaps without Sticky Strip, press to adhere.
- Remove Sticky Strip backing from the two remaining flaps. Fold down, press to adhere. Also press from inside the basket to get a good bond.
And this is it for the basket. May be little bit tricky first time, but after you get a grip - super fast and easy Remember - flaps need to touch and NOT overlap.
- Handle - 3/4 x 8 1/2 piece of card stock. You may add 1/2 x 8 1/2 piece of designer paper on top of it. Add two small strips of Sticky Strip next to each other on both ends of handle on the front side. Adhere to your basket.
- Decorate as desired.
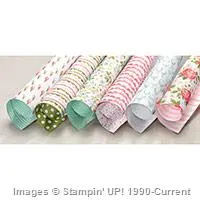
And this time I decided to do a basket in watermelon wonder color and use coordinating envelope paper instead of DSP and also use it for flower.
This is thin paper, so fold the paper and punch 2-3 layers at the time. This paper curls beautifully and you can see opposite side on flower petals.
You will need 8 big, 8 small and 2 double petals, plus 2 bigger and 2 smaller circles to assemble flowers. It goes very fast with glue dots.Stack those 4 circles with dimensionals. here is a little visual for you:
Leave me a comment if you like this project!
Would You like to receive my last class tutorial or kit to go? Check
Here.

Happy Stamping!
Product List