Thursday, May 21, 2026

Cute As a Bug – Fun Fold Card Tutorial

Hello, my stamping friend!

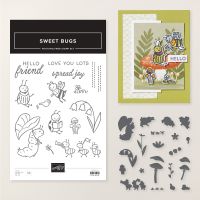
Today I’m sharing a project that completely stole my heart — this Cute As a Bug Fun Fold Card. I’ve been crafting with this bundle nonstop, and I have to say… I am truly in love with it. The images are sweet, the sentiments are versatile, and the dies that create the mushrooms are just irresistible. They’re whimsical, playful, and add that perfect enchanted‑forest feel that makes any card instantly charming. Every time I cut one out, it feels like I’m building a tiny little world on paper.


This fun fold design is simple enough for beginners but has that wonderful “wow” moment when you open it. Between the ladybug, the soft florals, the sweet sentiment, and those adorable mushrooms, this card has so much personality. I added just a few extra mushrooms for embellishment — not too many, just enough to keep it cute, balanced, and full of movement.


✂️ Card Measurements

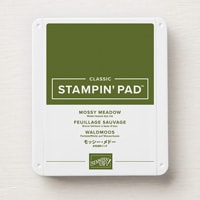
  • Mossy Meadow CS: 4 1/4 x 8 ½”, scored at 5 1/2”;  Front panel: 2 1/2 x 4 ¼”
  • Basic White: 4 x 4 1/4"; 2 3/4 x 4"; 2 1/4 x 4; 
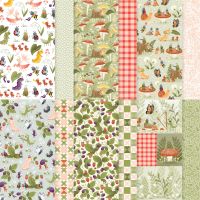
  • Designer paper layers: 2 1/8 x 3 7/8"; 2 5/8 x 3 7/8"; 2 3/8 x 3 7/8";
  • Sentiment label: die‑cut using Stylish Shapes
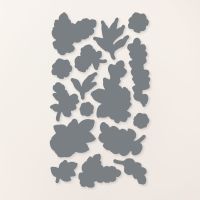
  • • Mushrooms: cut using the coordinating dies from the bundle

🔗 Watch the Full Tutorial


Need supplies - visit my online store.

💛 Stay Connected & Get More Creative Inspiration. 

I love sharing simple, joyful paper crafting ideas, and I’d be thrilled to have you join my creative community.

• Follow me on Facebook for daily inspiration, live videos, and new project ideas

👉 Facebook

• Join my newsletter for exclusive projects, early class access, and special updates

👉 Join Email List

Happy Stamping!

Friday, April 10, 2026

APPT March Blog Hop


Hello, my stamping friend. Thank you so much for stopping by today!

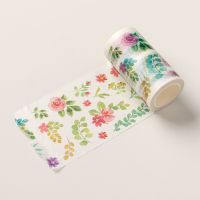
This month’s Paper Pumpkin kit was so easy and enjoyable to work with. I absolutely love the stamp sets and the hummingbird element — they’re beautiful on their own, but for my alternates, I felt the projects needed just a little more floral detail. So I pulled in the Extraordinary Flora Washi Tape, die‑cut a few pieces, and used those floral accents on both of my cards.

My first project is a simple, clean three‑square layout where I added a pop of Petunia Pop to brighten the design. 


The squares are 1 3/4" each. Check a video on how to create the card with this layout. 

For my second project, I created a funky fold gift card holder using the envelope. I cut the envelope to use on a card front and a flap to create a pocket for a gift card.  It’s a fun twist that shows how far you can stretch the pieces in this kit.

The triangle flap is 3 3/4" square folded diagonally:
When Open:

✂️ Measurements

  • Petunia Pop" 4 1/4 x 5 1/2"
  • Card Base: 5 1/4 x 8" scored at 4 1/4";
  • DSP Layer (envelope front) : 3 7/8  x 5 1/8”
  • Flap: 3 3/4 x 3 3/4" 

These alternates are simple, fun, and perfect for using up every last bit of the kit. I hope they inspire you to take your Paper Pumpkin creativity even further this month.

Before you go, I’d love to hear from you. Leave me a comment and tell me which card was your favorite this month. I always enjoy seeing what inspires you.

And don’t forget — make sure you’re subscribed so you don’t miss next month’s kit. There are so many fun ideas coming, and I can’t wait to share more with you.

Thank you for hopping along with me today. Continue the hop for even more creative inspiration and alternative ideas using the March Paper Pumpkin kit.


Happy Stamping!

Happy Stamping!

Thursday, April 9, 2026

Adorable Bee Card Tutorial | Hello Friend Three-Square Layout

Today I’m sharing this sweet and cheerful card made with the brand‑new Cute As A Bug bundle from Stampin’ Up! I had so much fun creating this one — the little bees, strawberries, and tiny details just make me smile.


The full video tutorial is available, so you can follow along step‑by‑step and make this card with me.


✂️ Measurements

  • Card Base: 5 1/2 x 7 1/2"; scored at 4 1/4";
  • DSP Layer: 3 x 5 1/4”
  • Three Squares: 1 3/4 x 1 3/4" each
  • White Squares: 1 1/2 x 1 1/2";
  • DSP Squares (behind images): 1 3/8 x 1 3/8”
  • White Stitched Banner: using Stylish Shapes dies
  • Stamped & Die‑Cut Images: From Cute As A Bug bundle (bees, strawberries, ladybug)

💛 Why I Love This Card

The playful insects, the bright strawberries, and the stitched details make this card perfect for spring, friendship, and happy mail. It’s simple to assemble, but the layered squares give it that extra pop.

If you want to craft along, watch the video, grab your Cute As A Bug bundle, and let’s make something adorable together.

Need supplies - visit my online store.

💛 Stay Connected & Get More Creative Inspiration. 

I love sharing simple, joyful paper crafting ideas, and I’d be thrilled to have you join my creative community.

• Follow me on Facebook for daily inspiration, live videos, and new project ideas

👉 Facebook

• Join my newsletter for exclusive projects, early class access, and special updates

👉 Join Email List

Happy Stamping!

Product List

Friday, March 6, 2026

APPT February Blog Hop

Hello, my stamping friend!

Thank you so much for stopping by today. I’m excited to share two projects I created using the February Paper Pumpkin kit. This month I challenged myself to stick as closely as possible to the contents of the box and add only the essentials. Creating simple projects with limited supplies is always a fun stretch for me, and I loved how these turned out.


I made a twisted easel card and a basket treat holder—both quick, fun, and perfect for showcasing the beautiful elements in this month’s kit.

🌸 Twisted Easel Card

For the card base, I used a 4¼" x 11" piece of Shy Shamrock, scored at 5½", and then scored the front panel diagonally to create the easel fold.

  • The focal panel is adhered to the bottom triangle on the inside of the card.
  • Flowers from the kit act as a stopper to hold the easel open.
  • I added a simple bow for a soft finishing touch.

This fold is so easy, but creates such a fun display piece.

🧺 Basket Treat Holder

For the basket, I started with the back half of a card base I didn’t end up using.

  • Score all four sides at ½" to form the top portion of the basket.
  • On the 5½" side, score at 2½" and 3" to shape the sides.

For the bottom, I used a slightly larger piece of Basic Beige, measuring 5¼" x 6½", scored at 1" on all sides. This gives the basket a sturdy base.

The handle is ½" x 8½", and I decorated it with a tag and flower from the kit.


🌼 Bonus Project

I also created an extra card using the front portion of the card base I cut for the basket. It uses the same twisted easel fold as the first card—nothing goes to waste around here!


Thank you again for visiting today.

I hope these ideas inspire you to open your kit and start creating. Make sure to join us next month for our hop, and don’t forget to subscribe to Paper Pumpkin so you never miss the fun.

Happy stamping! 💛

links

Tuesday, March 3, 2026

Sweet & Simple 6x6 Treat Pouch — No Measuring Needed!

Hello, my stamping friend!

I’m so excited to share this adorable little treat pouch with you today! It’s one of those projects that looks fancy but takes only a few minutes and uses just a single 6x6 piece of paper. No measuring, no scoring tools — just a few folds and you’re done.

This is the perfect project for brightening someone’s day, gifting coworkers, adding a handmade touch to a party, or creating a quick “just because” surprise.


If you’d like to see exactly how I made it, here’s the quick video tutorial:


👉 Watch the full video on YouTube:

Supplies Used

• 6x6 patterned paper

• Strong adhesive (optional)

• Small treats or notes to tuck inside

That’s it — truly a no‑stress project!

💛 Stay Connected & Get More Creative Inspiration. 

I love sharing simple, joyful paper crafting ideas, and I’d be thrilled to have you join my creative community.

• Follow me on Facebook for daily inspiration, live videos, and new project ideas

👉 Facebook

• Join my newsletter for exclusive projects, early class access, and special updates

👉 Join Email List

Thank you for stopping by today — I hope this little treat pouch brings a smile to someone in your world. 

Happy Stamping!

Thursday, February 12, 2026

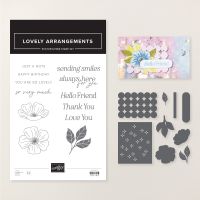
Lovely Arrangements Stamp-a-Stack

 Hello, my stamping friend!

Last Friday and Saturday I hosted my in‑person Lovely Arrangements Stamp‑A‑Stack, and it was such a joy. The event was a huge success — we created eight stunning, all‑different cards, each showcasing unique techniques, folds, and styles ranging from quick‑and‑easy to wonderfully over‑the‑top. We also made a beautiful coordinating purse, and everyone received an exclusive matching gift favor to complete the collection.

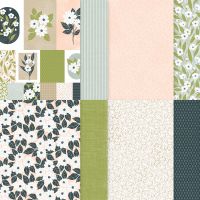
Today I’m excited to share one of the card designs from the class. This one was packed with fun techniques — a stenciled background, scalloped edges, soft sponging, and layered details that make the whole card come alive. The Lovely Blossoms Suite makes designing so effortless and inspiring.

If you missed the live class, you can still enjoy the full experience at home.

Only 2 To‑Go Kits remain, and they include all the pieces, instructions, and special touches that made this class so memorable.

Register Today!

Happy Stamping!